[ENG-ESP] LEATHERFACE DRAWING (TEXAS CHAINSAW)
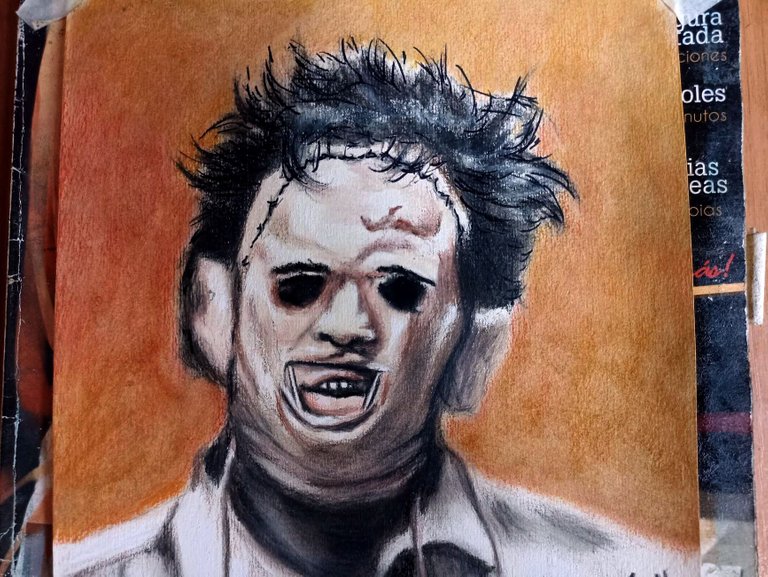
Hello friends, I hope you are very well, today after watching the Texas Chainsaw movie crap for a while, I decided to draw a picture of the classic cannibalistic psychopath Leatherfacer, I didn't like the movie at all, I just enjoyed the bus scene, the rest of the empty cinema we have now. I made this drawing based on the classic design, I did it with prismacolor colors on Fabriano paper, I hope you like it.
Hola amigos, espero que se encuentren muy bien, hoy luego de ver un rato el bodrio de película de Texas Chainsaw, decidí hacer un dibujo del clásico piscópata canibal Leatherfacer, no me gustó para nada la película, solo disfruté la escena del autobus, del resto cosas del cine vacío que tenemos ahora. Este dibujo lo hice basándome en el diseño clásico, lo hice con colores prismacolor sobre papel fabriano, espero que les guste.

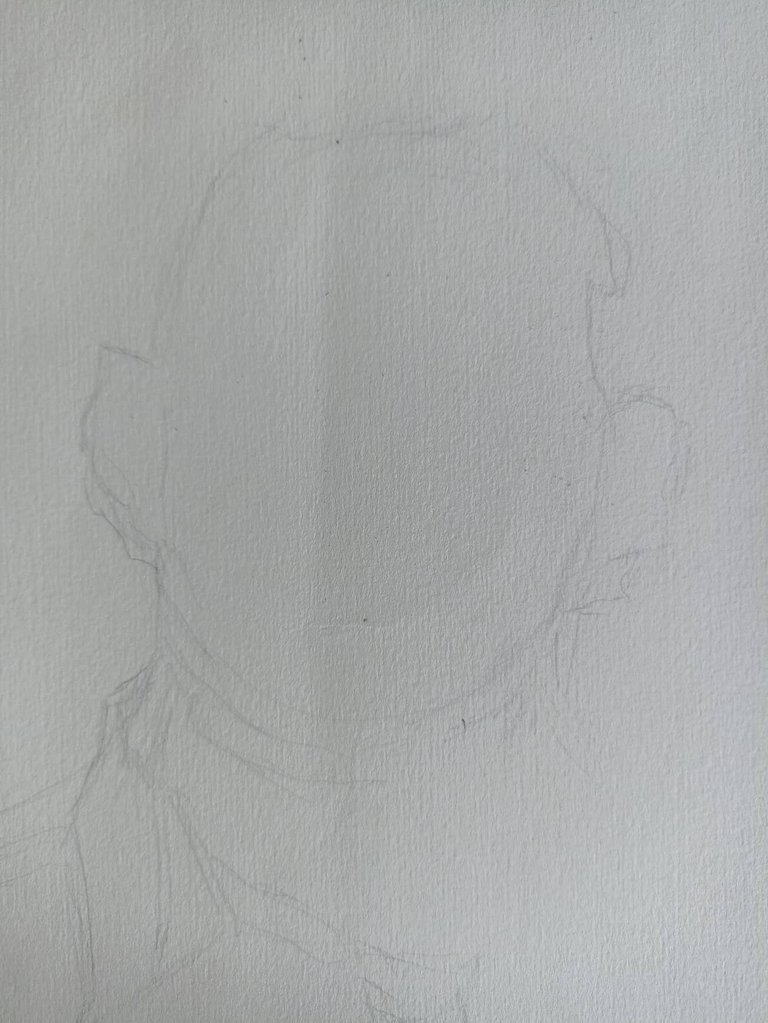
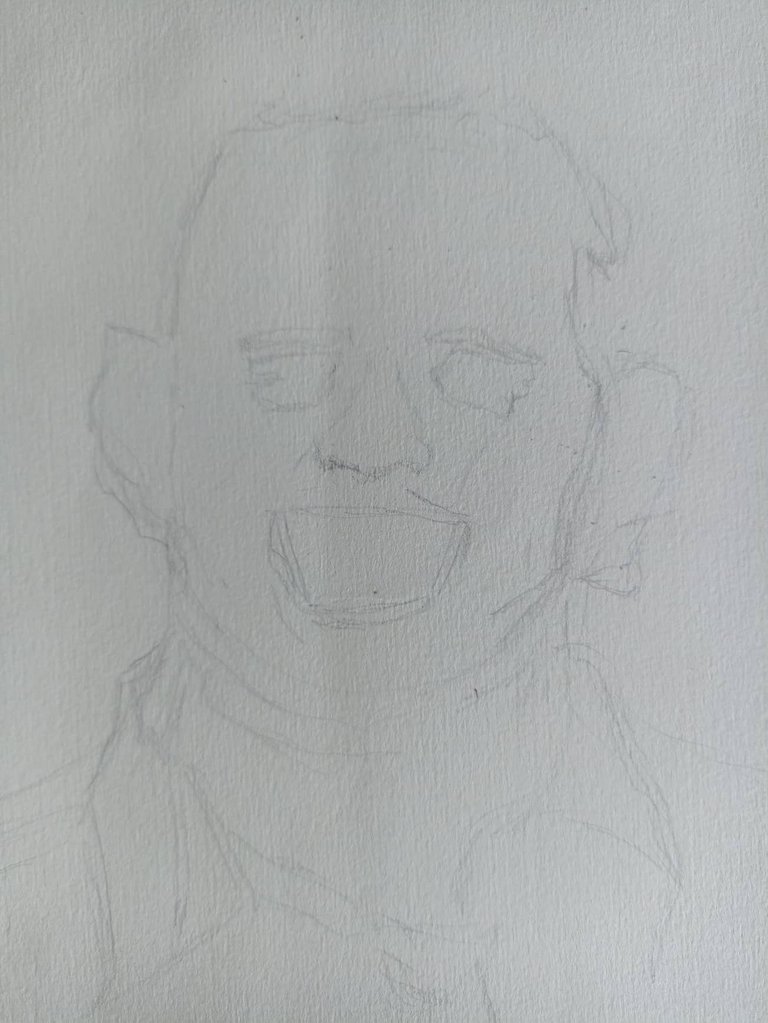
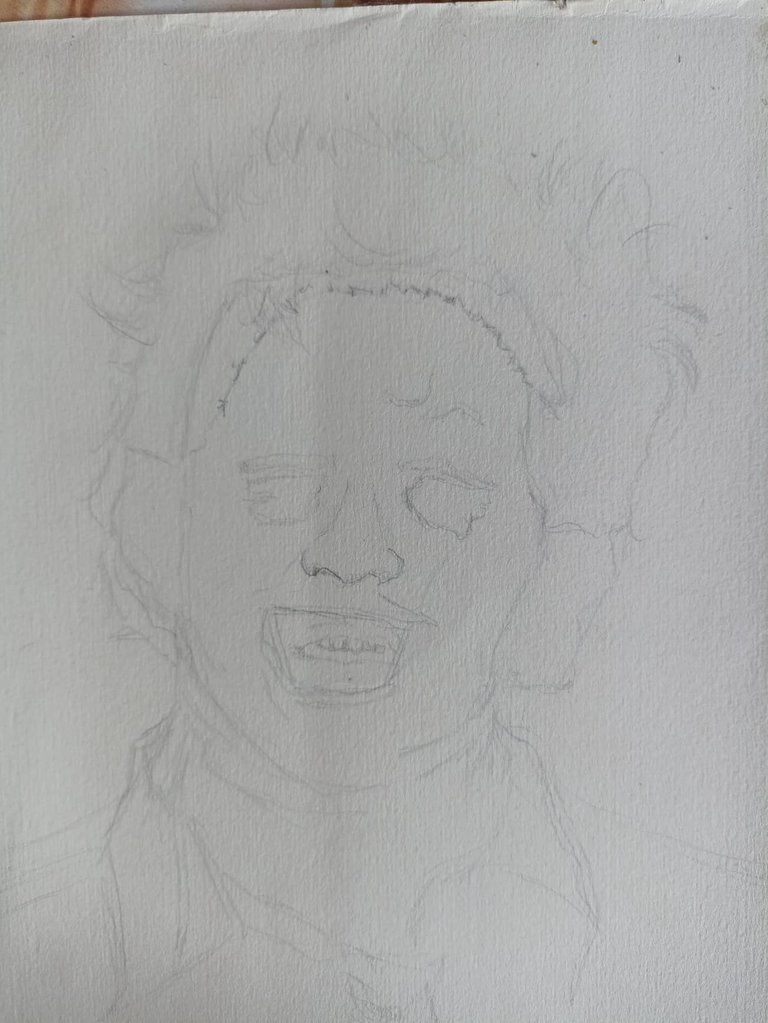
For this drawing we make a quick sketch with a hard lead pencil that will help us to easily remove the lines later. We start by drawing little by little the parts of the face, Leatherface wears a mask made of human skin, so we have to make the strokes and then color those details. While I was doing it I was noticing that the part of the eyes looked a lot like Michael Myers so I corrected that.
Para este dibujo hacemos un boceto rápido con un lápiz de mina dura que nos sirva para luego quitar facilmente las líneas. Comenzamos dibujando poco a poco las partes del rostro, Leatherface usa una máscara hecha de piel humana, así que tenemos que hacer los trazos para luego colorear esos detalles. Mientras lo hacía iba notando que la parte de los ojos se parecía mucho a Michael Myers así que fui corrigiendo eso.
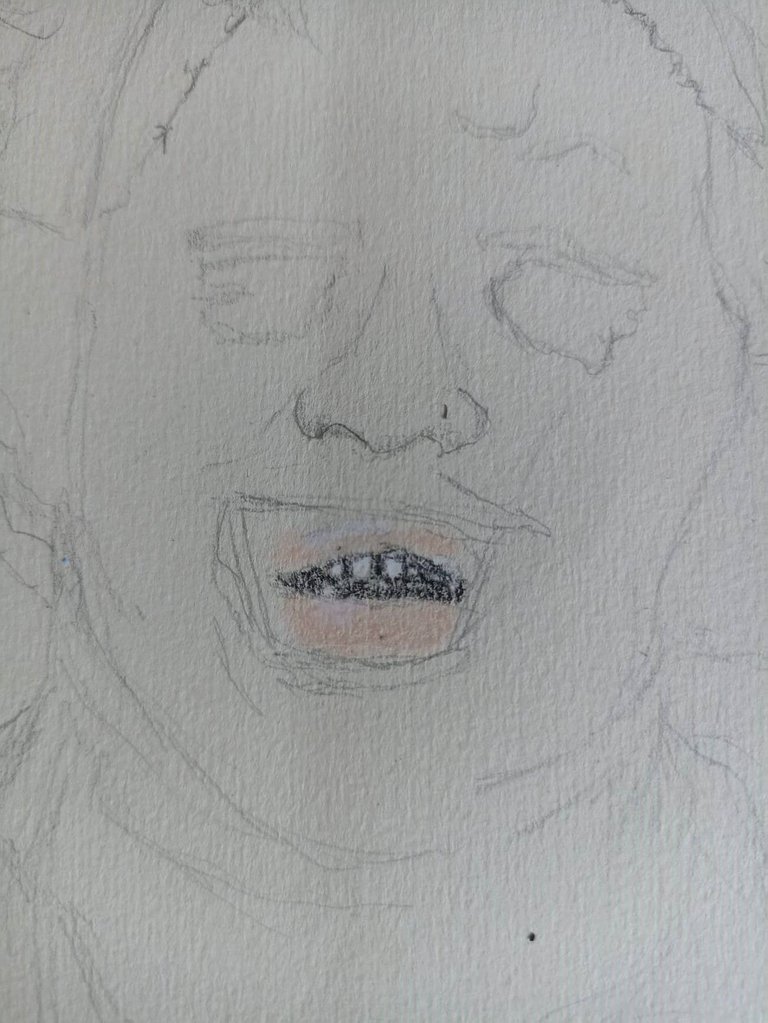
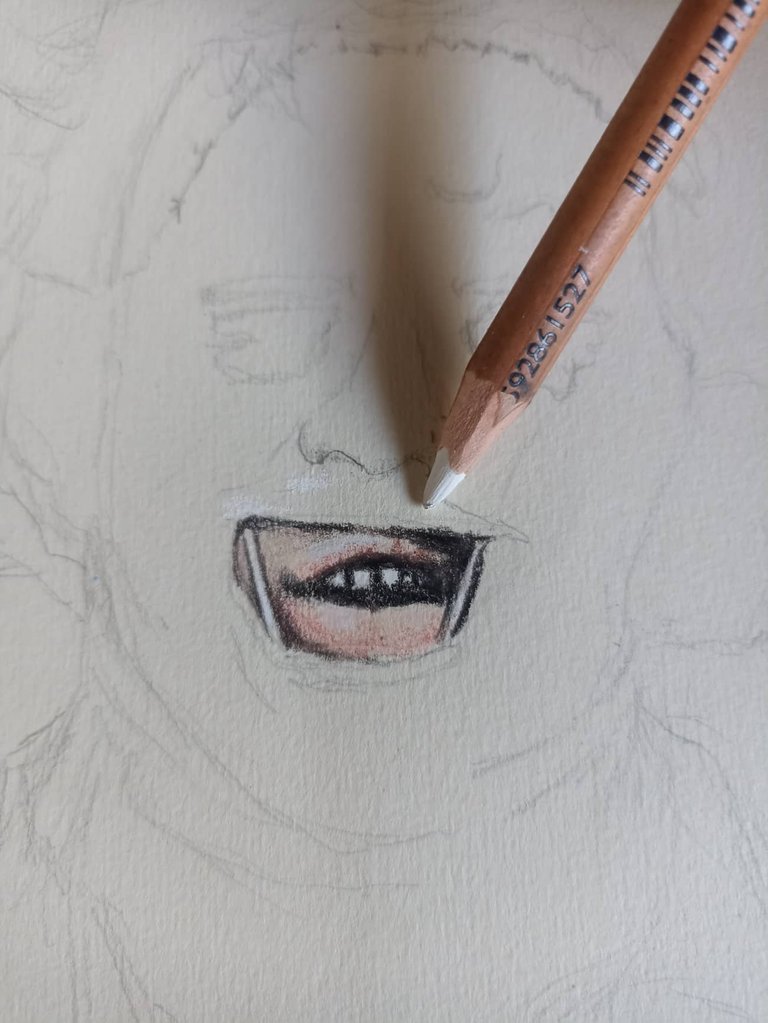
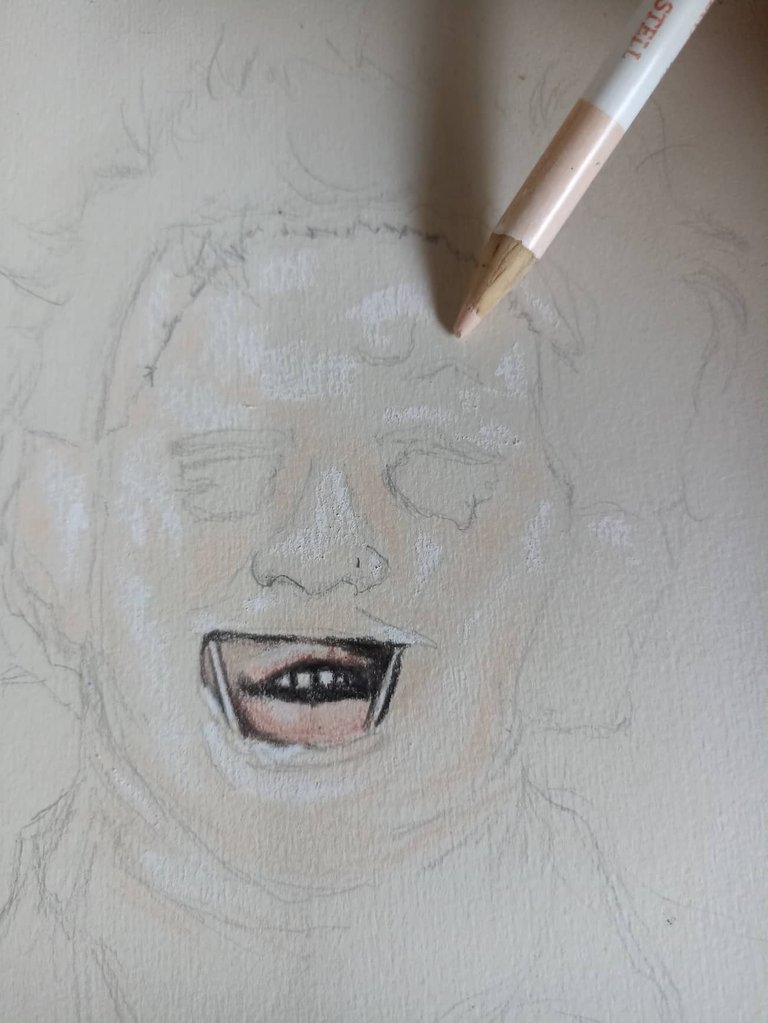
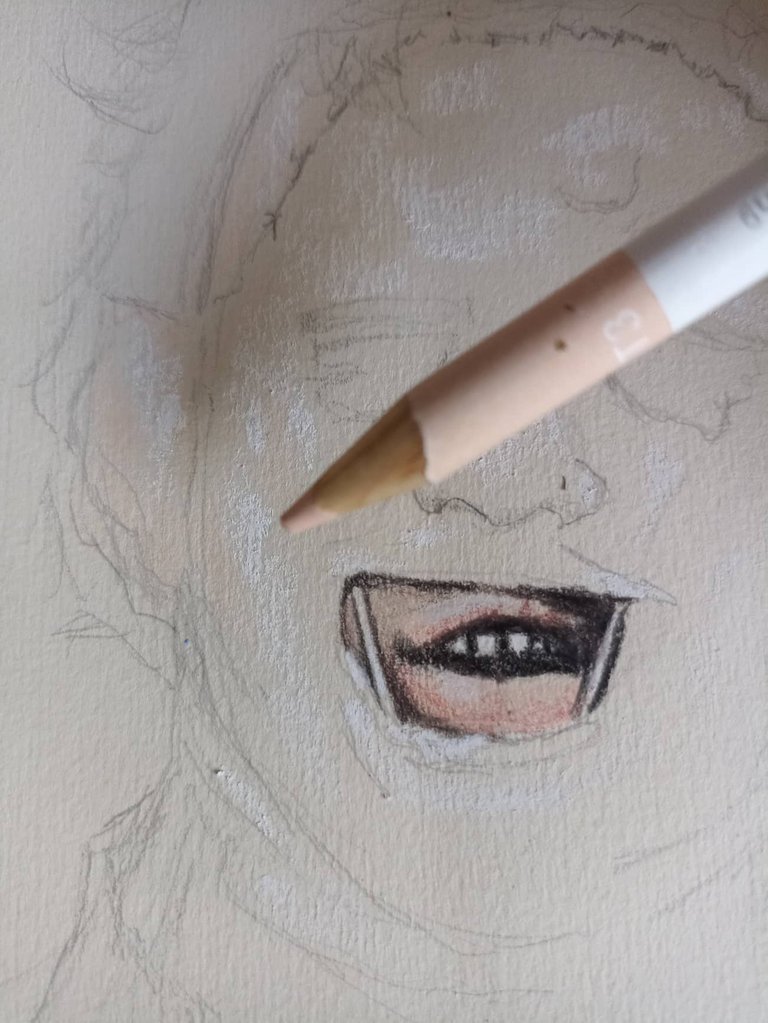
The next step is to start painting the details of the mask, which as we mentioned before is made of human skin, so we start with white pencil for the lighted areas and we begin the process of grading towards the darkest using a light pastel color first. , so we are tracing the limits of lights and shadows of the mask.
El siguiente paso es comenzar a pintar los detalles de la máscara, que como mencionamos anteriormente es de piel humana, así comenzamos con lapiz blanco para las zonas iluminadas y vamos comenzando el proceso de degradado hacia lo más oscuro utilizando en primer lugar un color pastel claro, asi vamos trazando los límites de luces y sombra de la máscara.
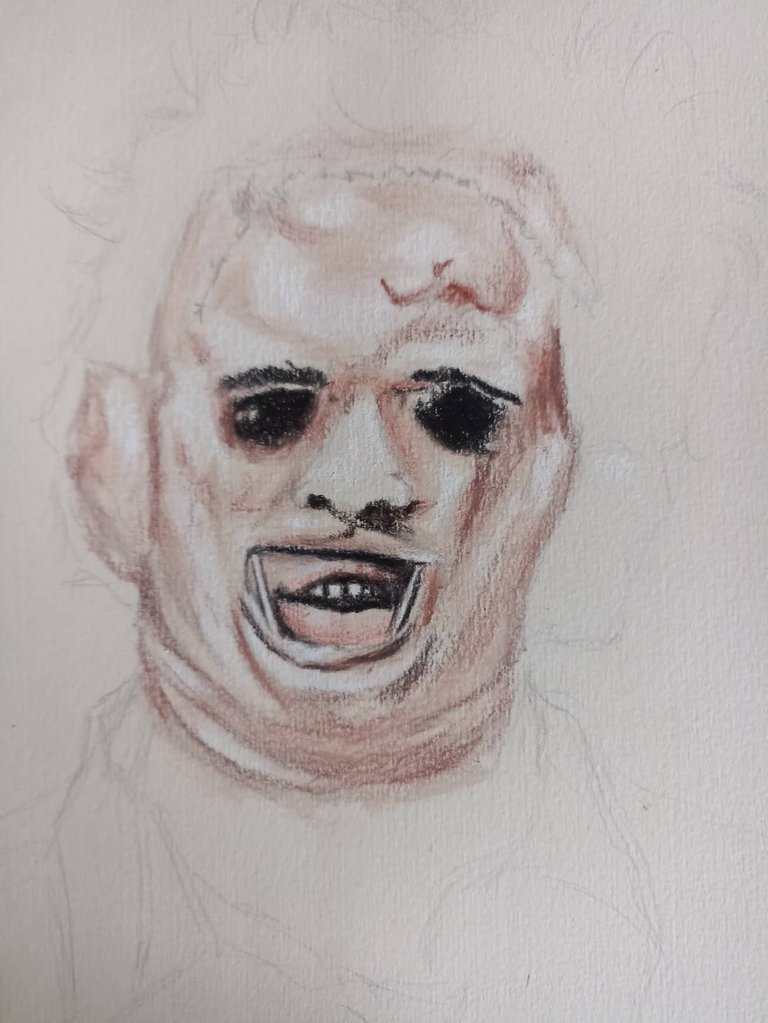
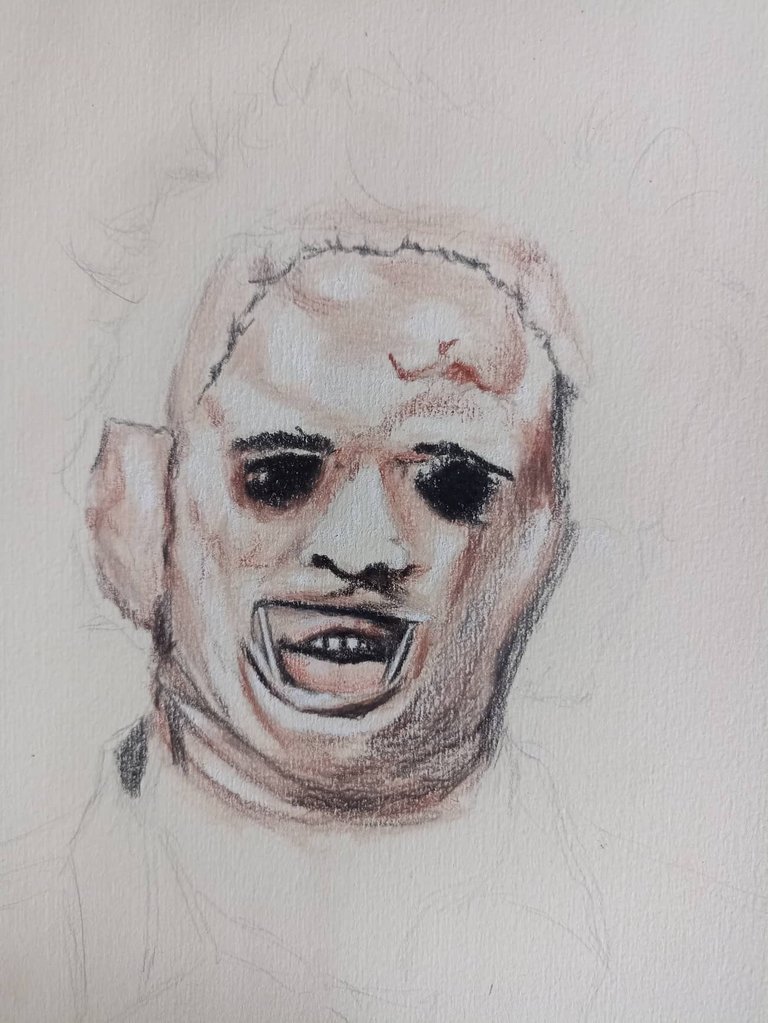
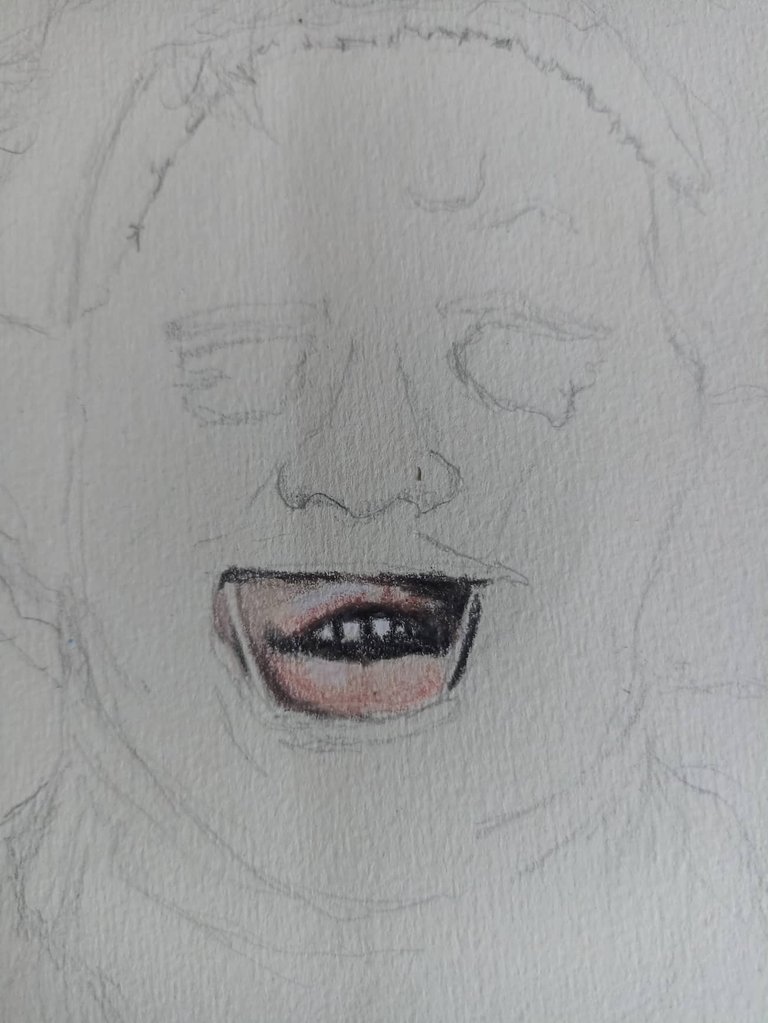
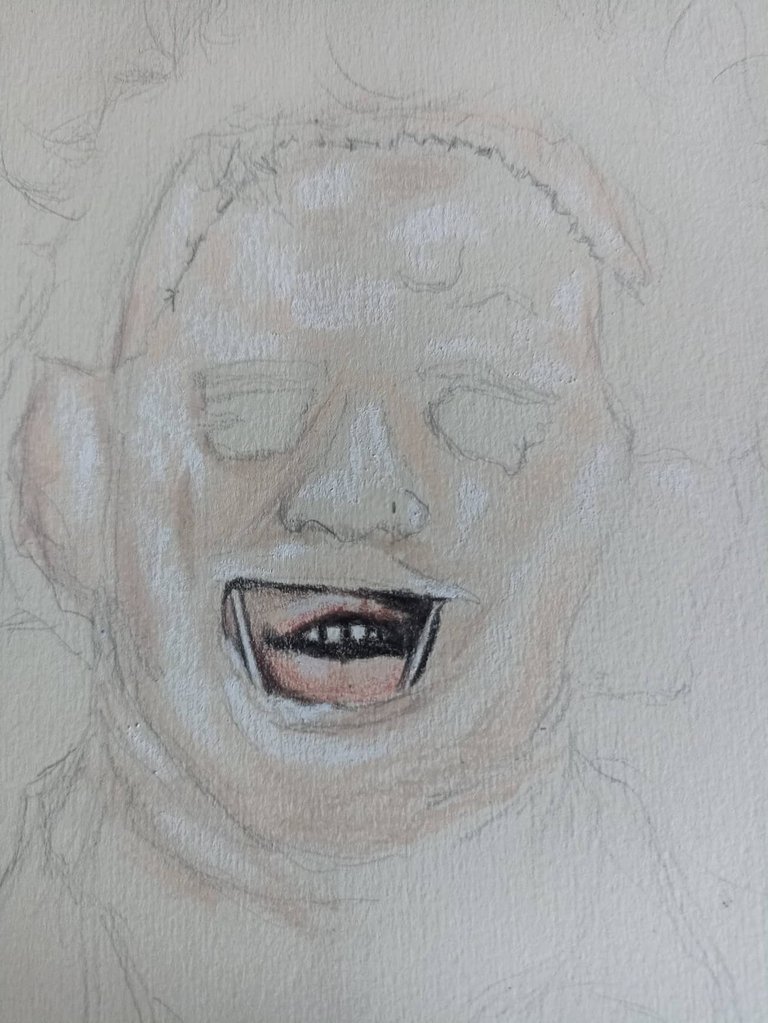
Then we go to a second level of gradient placing terracotta brown color, which is a tone similar to the color of the bricks, we paint all the areas and also with black color we color the eye sockets and the darker areas already visible as the seam that has the mask in the forehead area.
Luego pasamos a un segundo nivel de degradado colocando color café terracota, que es un tono parecido al color de los ladrillos, pintamos todas las zonas y tambien con color negro vamos coloreando las cuencas de los ojos y las zonas más oscuras ya visibles como la costura que tiene la máscara en la zona de la frente.
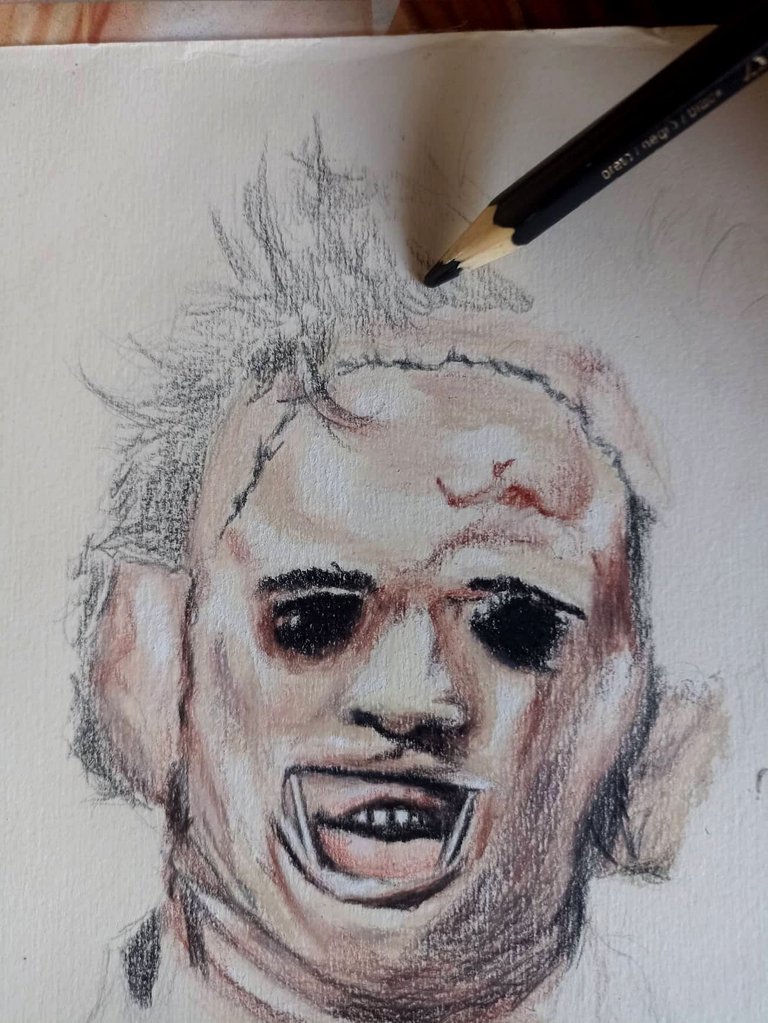


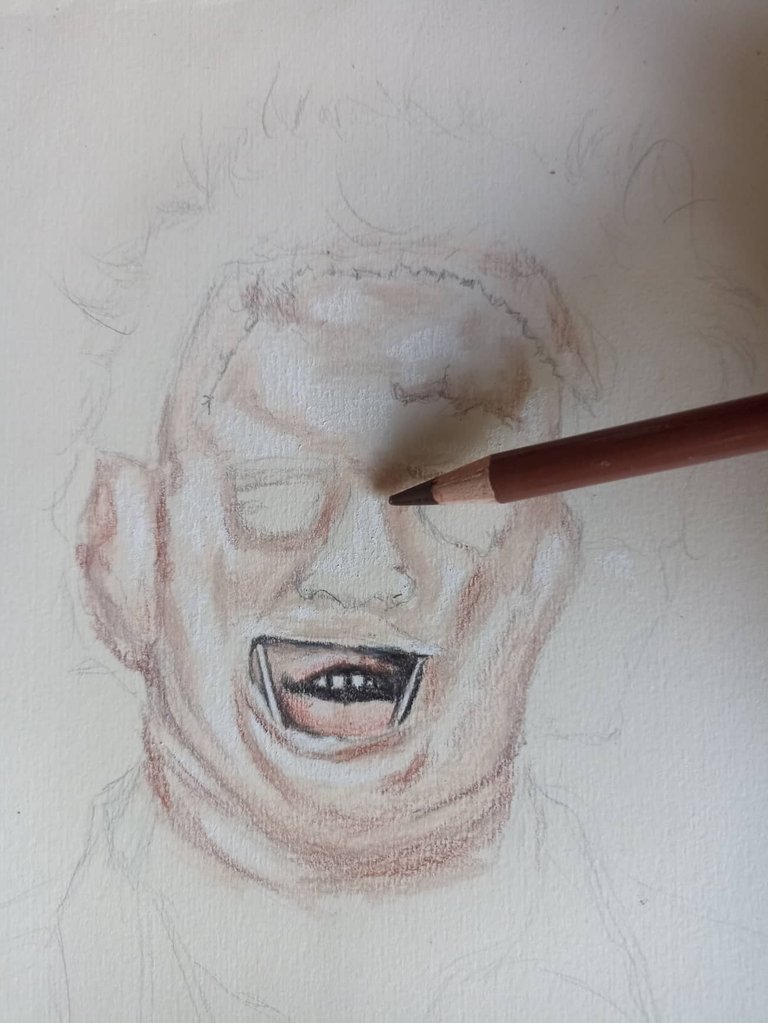
After almost finishing the first part of the face painting, we begin to outline the hair with dark brown and black, as Leatherface's hair is messy, we have to make the strokes very quickly so that the hair fits us very well, like this We paint the entire area corresponding to the hair and then with a soft brush we blur it to give more volume to the color and also so that the bright parts can be seen, which we can then do with white.
Luego de estar casi terminado la primera parte de la pintura del rostro comenzamos a delinear el cabello con color marrón oscuro y negro, como el cabello de Leatherface está desordenado, tenemos que hacer los trazos muy rápidos para que el cabello nos quede muy bien, así pintamos toda la zona correspondiente al cabello y luego con un pincel suave lo difuminamos para darle más volumen al color y también para que pueda verse las partes brillantes, que luego con color blanco las podemos hacer.

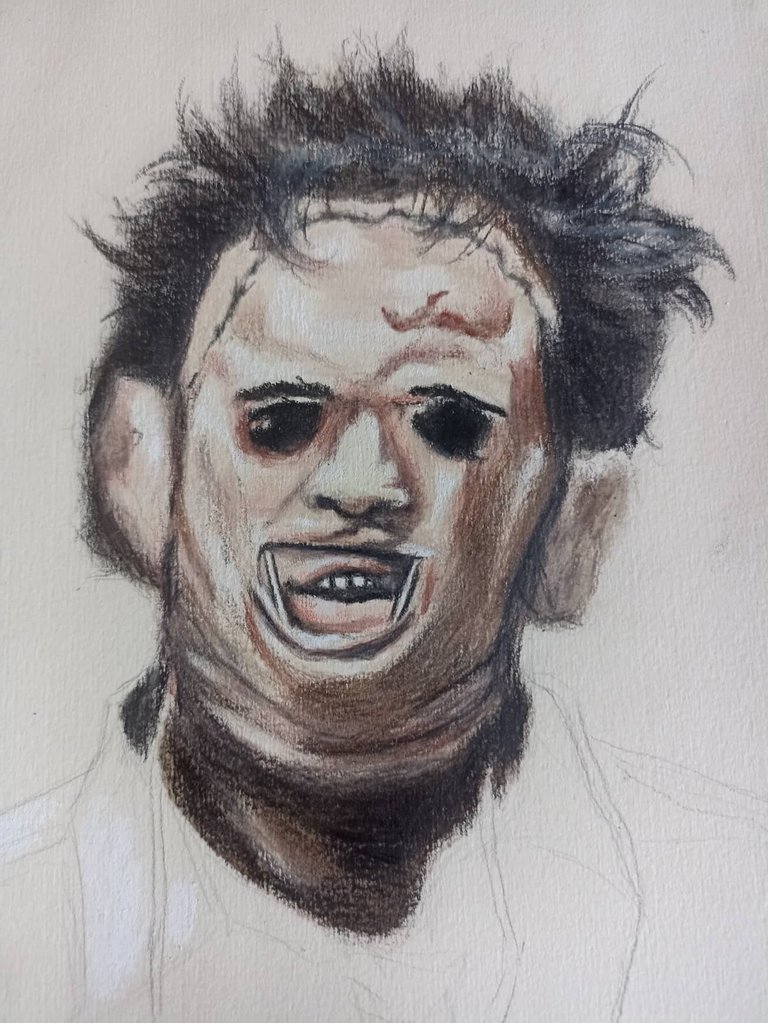

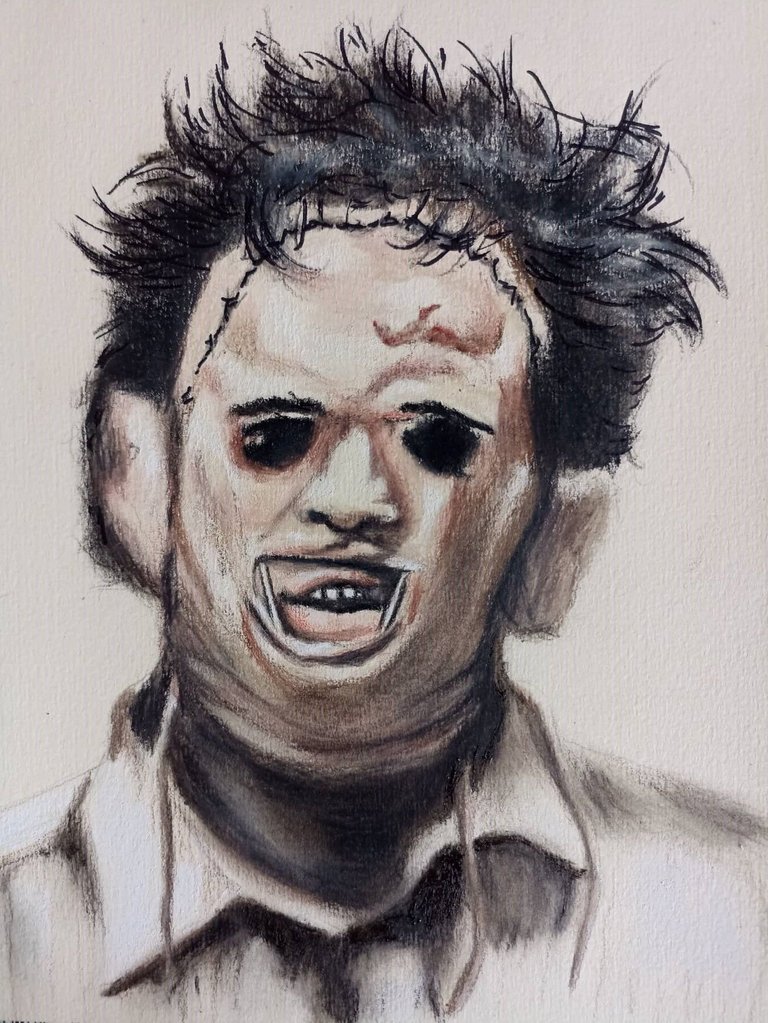
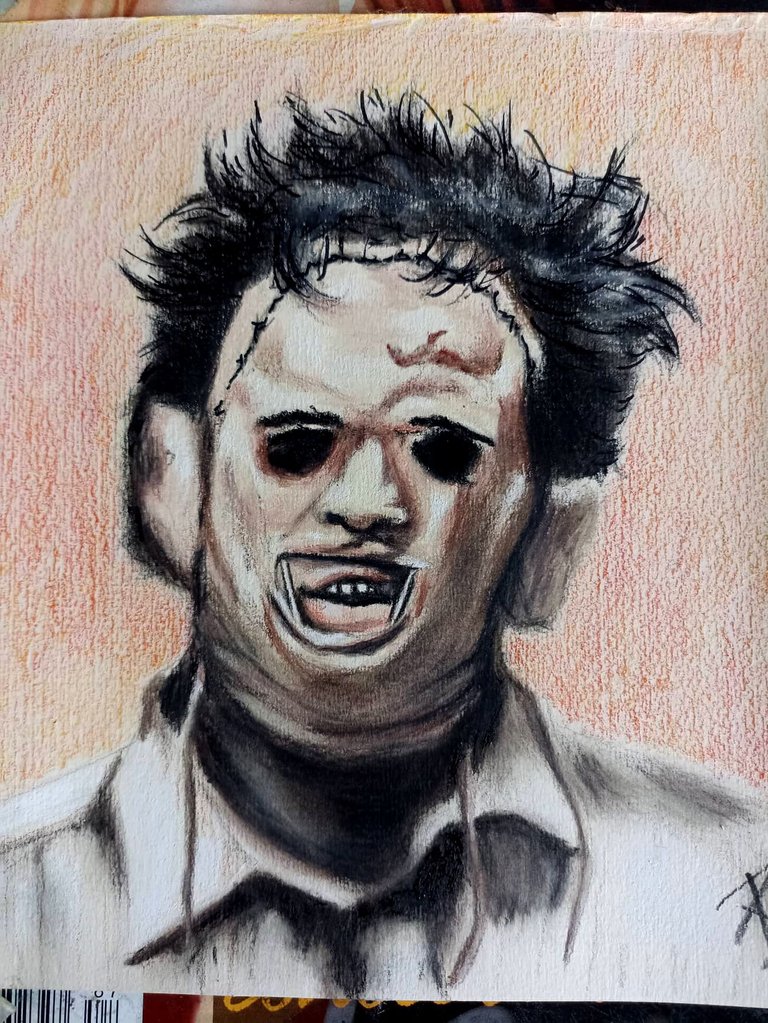
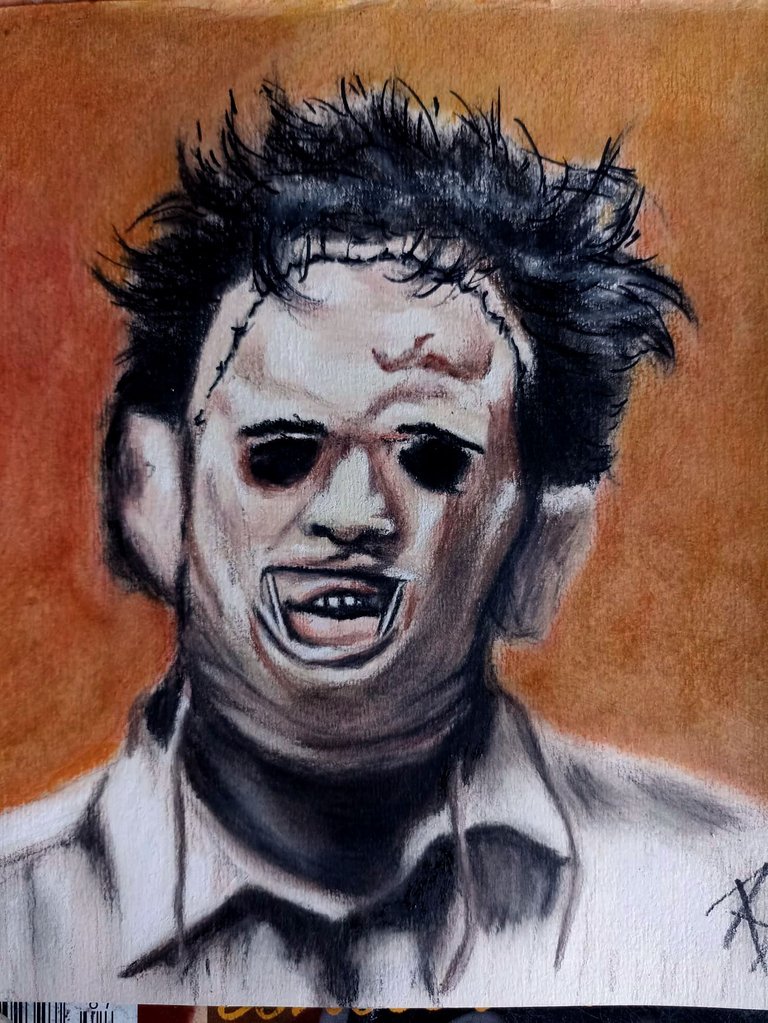
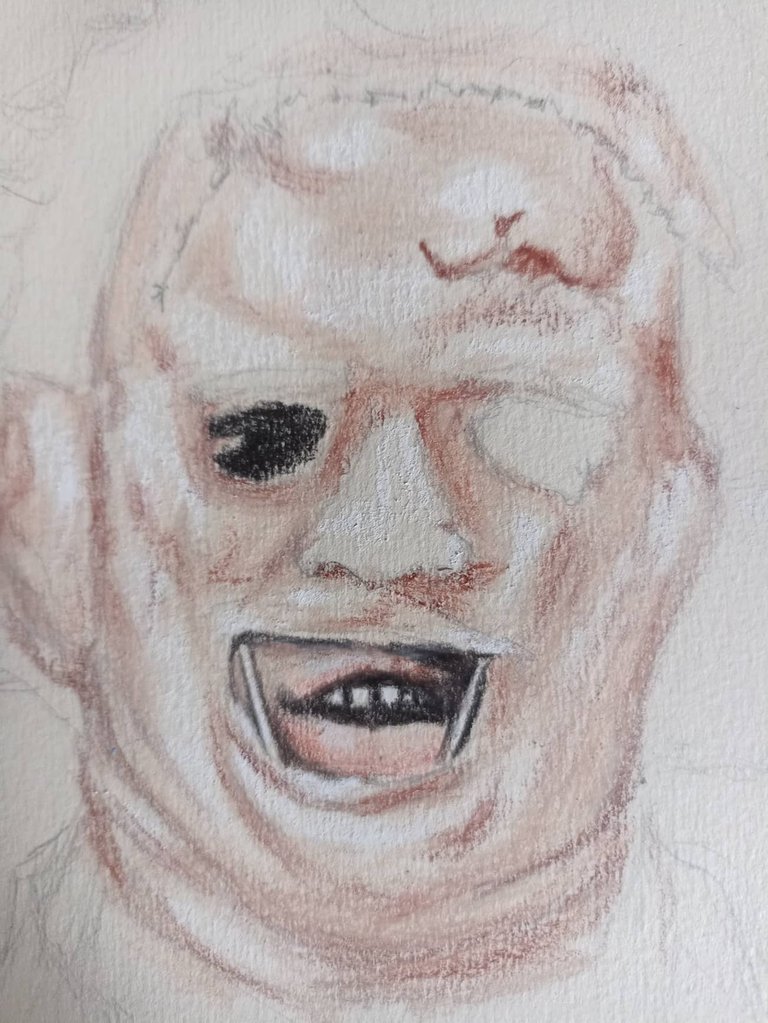
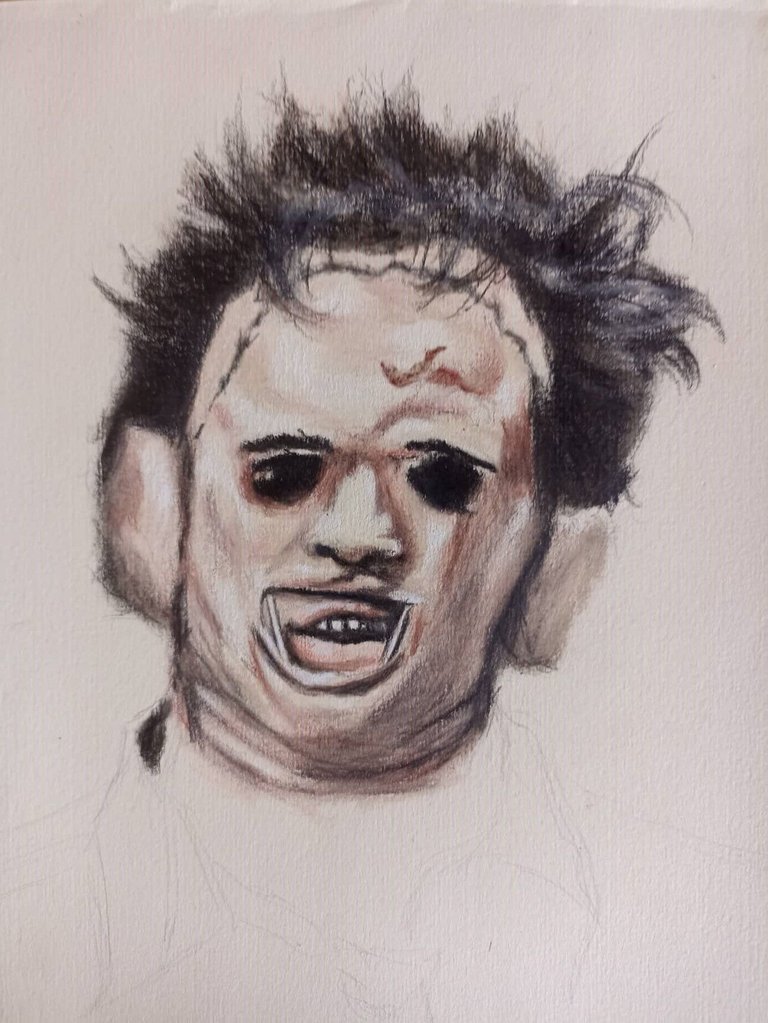
Following the same process as above, we begin to paint the part of the neck that is darker since the mask does not allow light to reach it, so we use dark colors such as brown, terracotta and black and trace the entire area, then blur as we did with the hair using the brush. We painted Leatherface's disheveled shirt and we also applied the brush to the darker parts, once the whole face was finished we painted a background, I chose warm colors to represent the danger and evil present in Leatherface, we mixed the colors and finally we blur, so we have finished the drawing.
Seguidamente haciendo el mismo proceso anterior, comenzamos a pintar la parte del cuello que es más oscura ya que la máscara no permite que llegue la luz, así que usamos colores coscuros como el café, terracota y negro y trazamos toda la zona, luego difuminamos como hicimos con el cabello utilizando el pincel. Pintamos la camisa desaliñada de Leatherface y tambien aplicamos el pincel para las partes más oscuras, una vez terminado todo el rostro pintamos un fondo, yo escogí colores cálidos para representar el peligro y la maldad presente en Leatherface, hacemos las mezclas de colores y por último difuminamos, así hemos finalizado el dibujo.
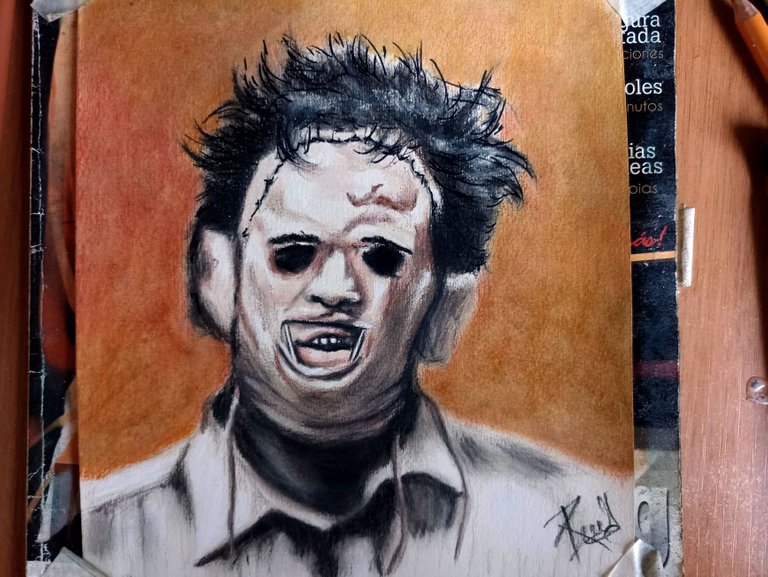

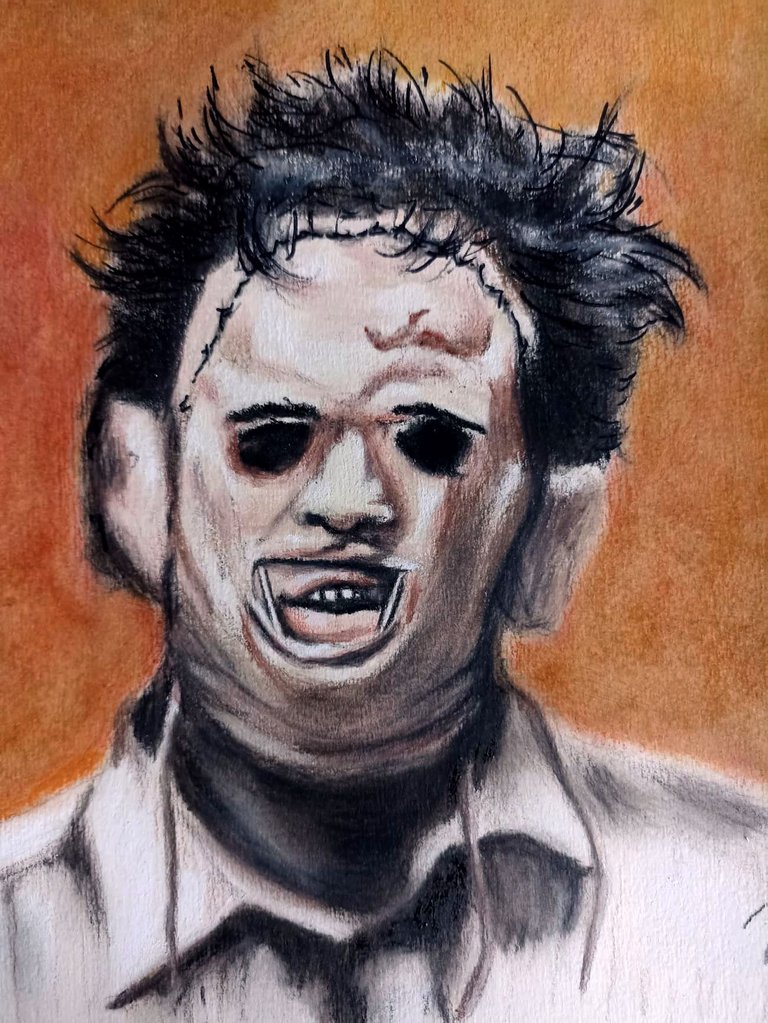
After finishing the drawing, it is always good to review again the steps that we have carried out to reinforce everything that still does not convince us. The good thing about this is that we can apply more color making our drawing more alive and realistic, especially the cannibal psychopath Leatherface and his horrible mask, who for those who have seen the movie know very well about his atrocities. Who do you think would win in a fight? Michael Myers or Leatherface? hehe. I say goodbye to you see you soon, do not forget to comment what you think. See you later.
Luego de finalizar el dibujo siempre es bueno repasar otra vez los pasos que hemos realizado para reforzar todo aquello que aún no nos convence. Lo bueno de esto es que podemos aplicar más color haciendo que nuestro dibujo quede más vivo y realista, especialmente el psicópata canibal Leatherface y su horrible máscara, quien para el que haya visto la película sabemos muy bien de sus atrocidades. ¿Para ustedes quién ganaría en una pelea? ¿Michael Myers o Leatherface? jejej. Me despido de ustedes hasta pronto, no olviden comentar que les ha parecido. Nos vemos.
0
0
0.000
https://twitter.com/boby_Wsix/status/1539787383486533633
The rewards earned on this comment will go directly to the people( @fixie ) sharing the post on Twitter as long as they are registered with @poshtoken. Sign up at https://hiveposh.com.
¡Muy buen post y excelente la descripción del proceso!
Solo hubo un detalle importante que pasaste por alto. Cuando uno utiliza una imagen de referencia para hacer un dibujo, es importante indicarlo y colocar la fuente.
¡Éxitos!
Muchas gracias amigo, y especialmente por ese gran consejo, ya lo apunté para una próxima oportunidad no pasarlo por alto.. Saludos!
Sí, es un detalle mucho más importante de lo que te imaginas... 😉
Congratulations @fixie! You have completed the following achievement on the Hive blockchain and have been rewarded with new badge(s):
Your next target is to reach 400 posts.
Your next payout target is 8000 HP.
The unit is Hive Power equivalent because post and comment rewards can be split into HP and HBD
You can view your badges on your board and compare yourself to others in the Ranking
If you no longer want to receive notifications, reply to this comment with the word
STOPTo support your work, I also upvoted your post!
Support the HiveBuzz project. Vote for our proposal!
Amazing
I'm glad you liked how the drawing turned out.
Pana tu ilustración quedo brutal
Gracias hermano, me alegra que te haya gustado full!
Muchas gracias por su apoyo!
Saludos mi querido amigo¡¡ yo vi esa película y la primera vez no dormí en casi toda la noche 🤭🙈, el dibujo te quedo excelente muy bien elaborado y los pasos los explicas muy detalladamente para que personas como yo podamos hacerlo también 👍😋☺
me imagino escuchaba el sonido de la motosierra persiguiéndola jajaja. Fue un gran clasíco de culto aún insuperable..